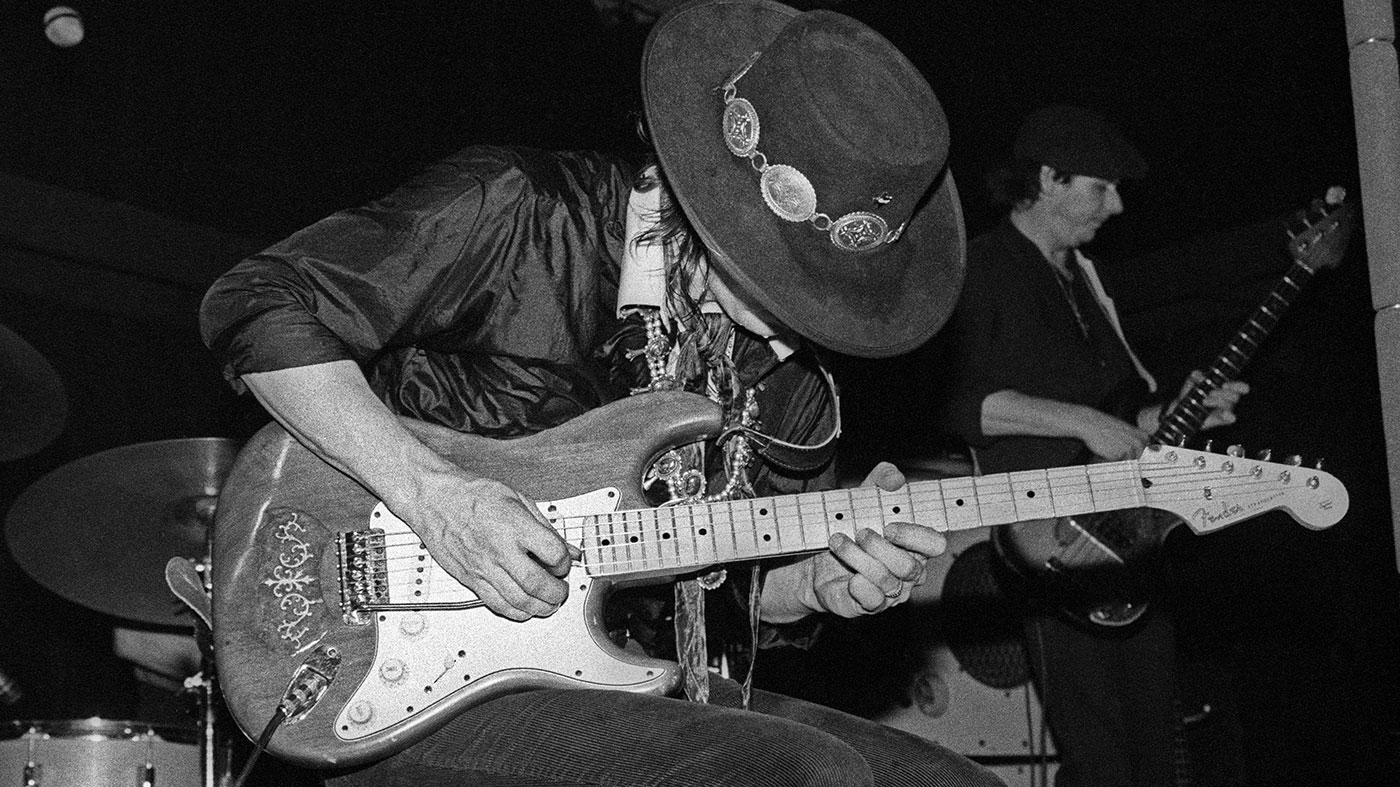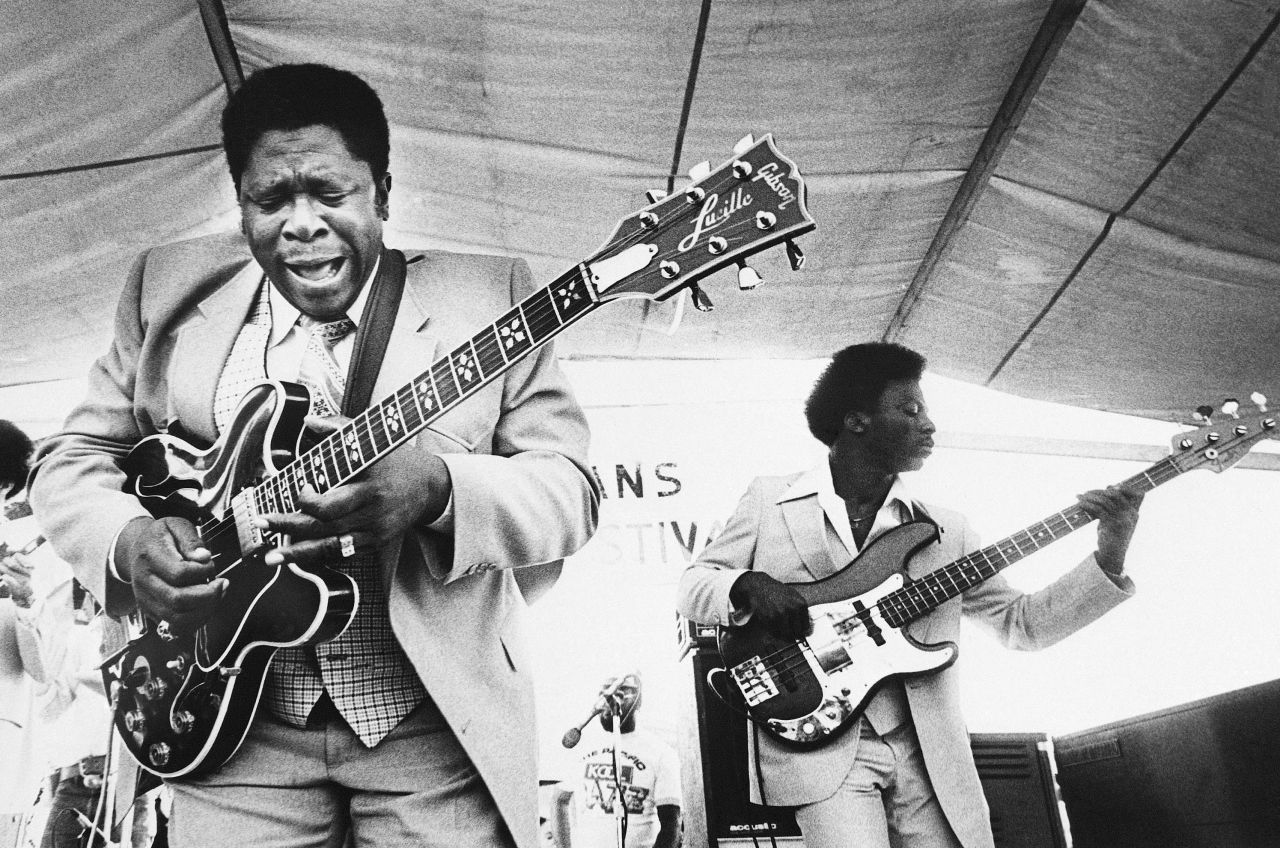
I recently got back into blues playing, so I thought I’d share this practice routine for getting the fundamental blues scales down and incorporated into your playing. Over the years, I’ve found that if I really want to learn something, I need a systematic approach that’ll take me through to the goal I’ve set for myself. In many of my books you’ll find the same methodical, constructivist and systematic approach to learning, which is heavily influenced by also being a language teacher. In this case, we’ll apply this kind of approach to learning how to use four of the most common scales used in blues improvisation.
The purpose of this practice routine is to learn how to blend the most commonly used scales in blues without having to jump all over the fretboard or be tied to root notes on the lower strings. Guitarists usually learn the five patterns for the minor pentatonic, then have problems bringing in other scales because they haven’t practiced playing and improvising in positions, which is a fundamental aspect of good blues soloing.
The Four Scales
The scales we’ll be blending here are the most commonly used scales in blues: the minor pentatonic, the major pentatonic, the Mixolydian mode, and the blues scale itself. The routine has only two basic steps with a focus on really using the scales in each position.
Step 1 – Run the four scales in one position on the neck until you know where the notes are, can distinguish between them, and are comfortable with the sound of each scale. Once you’ve accomplished this, Step 1 becomes the warm-up as running scales after you’ve memorized the patterns/note location becomes a (somewhat redundant) technical exercise. Use a metronome for this step, or if you’re not a fan of metronomes have some (blues) music on in the background and run your scales in time with that.
Step 2 – In this step we’re going straight into actual improvisation; this is the step you want to spend the bulk of your practice time on. Work on blending the scales to come up with your own licks and runs; pay close attention to the feel and sound each scale creates, and try to play what you hear in your head.
Step 3 – Spend time listening to your favorite blues players for these concepts, and begin to pick out their licks and runs.
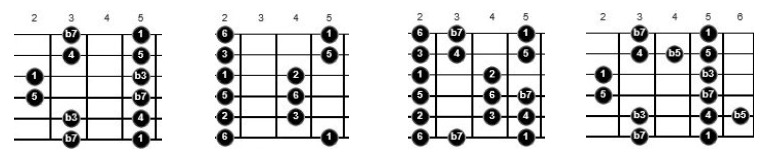
We’ll start with the most comfortable scale position and work in the key of A. If you’re comfortable with the minor pentatonic, you can see this as a framework for the other three scales.
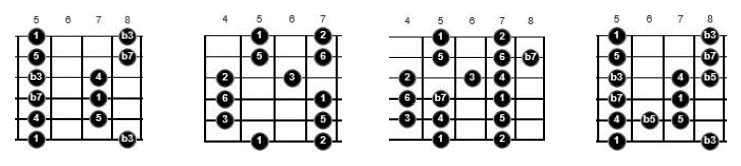
Once you’ve gotten the patterns down, go to Step 2 and start improvising either over your favorite A blues backing track, or if you have a looper pedal, try them out over an A7 chord. I’d recommend the latter as it’ll prepare you for playing the changes.
Let’s move to the next position, which takes us further up the fretboard.
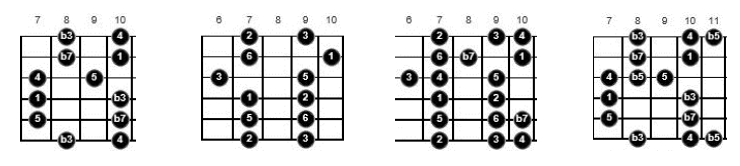
As you may know, the major and minor pentatonic patterns are the same, and if you move a major pentatonic pattern up a position, it’ll become a minor pentatonic pattern and vice versa. While this is good to know, it’s not incredibly useful in practice, and is not really a shortcut, because a) you tend to play the same licks using both scales which can sound good, but can also sound terrible, and b) you want to avoid jumping all over the fretboard to change scales. Apply steps one and two to these patterns and see what you can come up with.
Let’s take a look at the patterns on the nut side of the first set of patterns.
What you have here is more than enough scale shapes and choices to see you through a career of blues playing. If you base yourself in the classic minor pentatonic box one, with two sets of shapes either side you shouldn’t run out of ideas. Once you’ve applied steps one and two to these patterns, start working in other common blues keys such as E, G, C, D and a couple of flat keys for good measure such as F, Bb and Eb.
In Part 2 we’ll take a deeper look at these patterns, which is especially useful once you’ve gotten them under your fingers. Meanwhile, here’s a handy PDF with all the diagrams for you to print out and practice.